Guide
One design on every product: print placement, line layout and warp
A name that looks right on a t-shirt can look wrong on a mug, lost on a tote bag and pasted on over the curve of a cap. A shop that sells one design on many products needs two kinds of control: how the design sits on each product, and how each line of the design is laid out. This is how both work in Pomp Product Personalizer, and why the preview bends while the print file stays flat.
Set up each product once
Everything about where the print goes belongs to the product, not to the design. You set it once, on the product’s own edit screen, and every design in the catalogue follows it, including the ones you add next year.
- Print area. A box drawn on the product photo: where the print sits, and how big it is.
- Rotation. For a print that runs at an angle, such as across a sleeve or down a bottle label.
- The print’s own shape. The print file takes the shape of the print area, so a wide mug print and a tall shirt print each come out in their own proportions.
- Starting position. From 0 to 100: whether a short design sits at the top of the print area, in the middle or at the bottom. A long one fills it either way.
- Print colour per variation. White on the navy shirt, black on the white one, gold on the black mug. The same design prints in the right colour on every variation, from one file.
- A photo per colour. The preview uses the variation photo the customer is looking at, so the name is always shown on the shirt they are about to buy.
You can keep one layout for every product, or give each product its own. A shop selling only shirts sets it once; a shop selling shirts, mugs and caps gives each its own and never touches the designs.
The warp grid: curved products that look real
A mug, a cap, a pillow or a bottle is not flat, and a flat name laid over a photo of one looks like a sticker on the screen. The warp grid bends the preview to the surface.
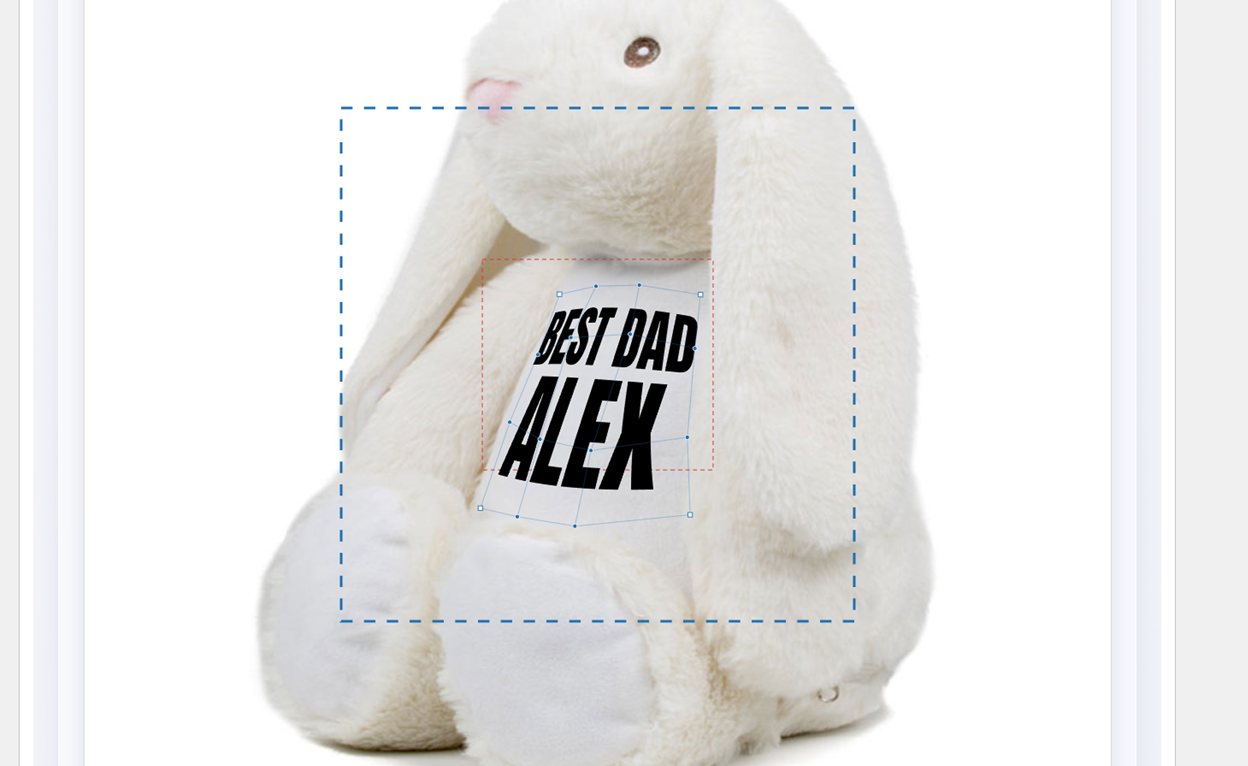
What lies over the print in the photo, such as a hoodie’s drawstrings or a toy’s paw, is a separate matter with its own answer: see personalized hoodies and the drawstrings.
- For a simple curve, move the arc slider: the whole print bends up or down, like the lettering on a mug.
- For anything more, drag the points of a 4 by 4 grid over the product photo, the same way a warp works in an image editor. The print follows the grid as you drag, and a zoom lets you place the points precisely.
- Keep vertical lets the points move only up and down while you drag them, which is what a cylinder needs: the curve of a mug stays even from one side to the other.
- Copy warp and Paste warp carry a finished grid to another product of the same shape. Set up one mug, and the other mugs take the same curve in a click.
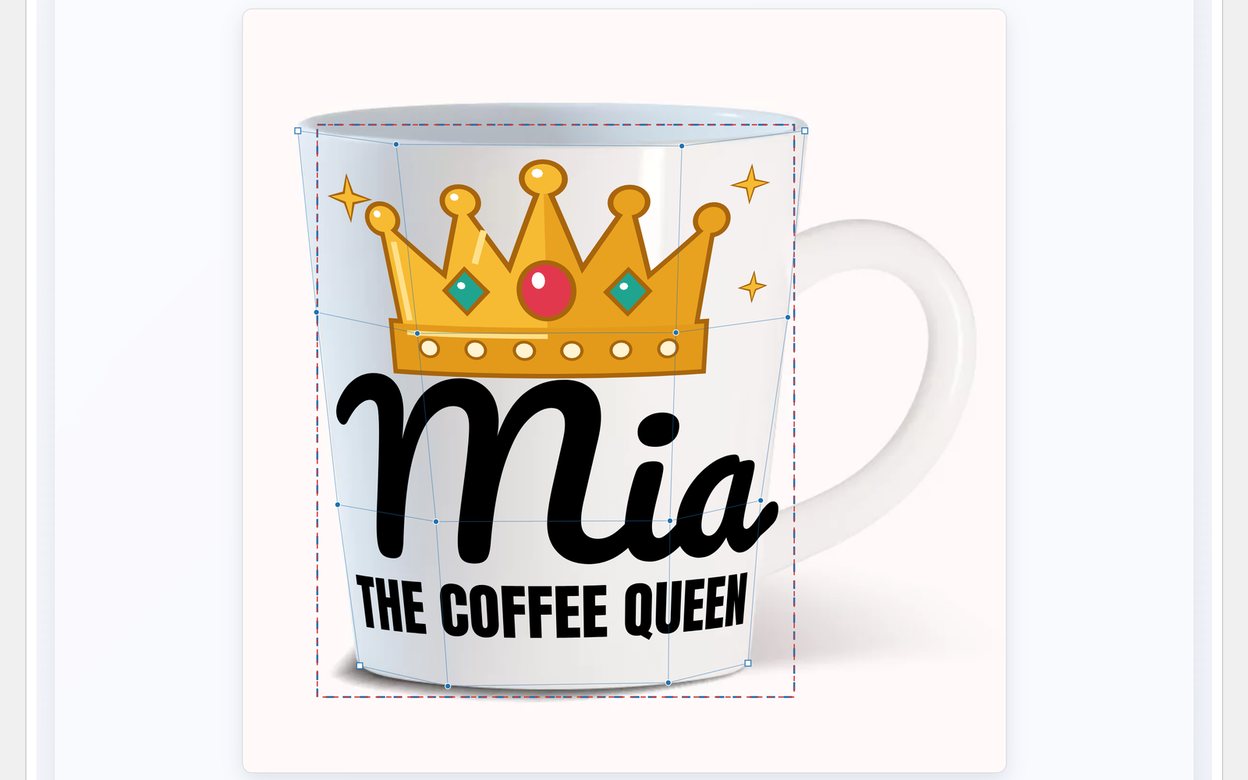
The grid belongs to the product, so every design, every customer name, and in Pro every uploaded SVG, bends the same way on it. A customer’s logo curves around a mug exactly as the lettering does; an uploaded photo is placed and rotated with the print area.
Why the print file stays flat. The warp is how the product looks, not how the print is made. The mug, the cap and the heat press do the bending. So the preview follows the curve, and the order still arrives with a flat SVG or PDF in the shape of the print area, ready for DTF, sublimation, vinyl or the laser. Printing a pre-bent file onto a mug would bend it twice.
Full control of every line
A design is up to six lines, and each line is set on its own. That is what makes one design look deliberate on a shirt instead of typed into a box.
| Setting | What it does |
|---|---|
| Line type | Fixed text with a place for the name, or a line the customer writes in full |
| Line height | From 25 to 150 % of one row, so “Champion” can be small above a big “DAD” |
| Vertical position | Stacked with the other lines, or pinned by its top, middle or bottom to an exact height in the print, measured by the letters themselves |
| Margins | A narrower line, so a short word does not stretch across the chest |
| Colour per line | One line in the print colour, another in an accent colour |
| Font and uppercase | Per design, in fonts you upload; alignment and letter spacing come from the layout |
| Maximum characters | A limit per product, and a long name shrinks to fit the width rather than running off it |
| A graphic behind the text | A drawing or a badge, with the name placed above, below or inside it |
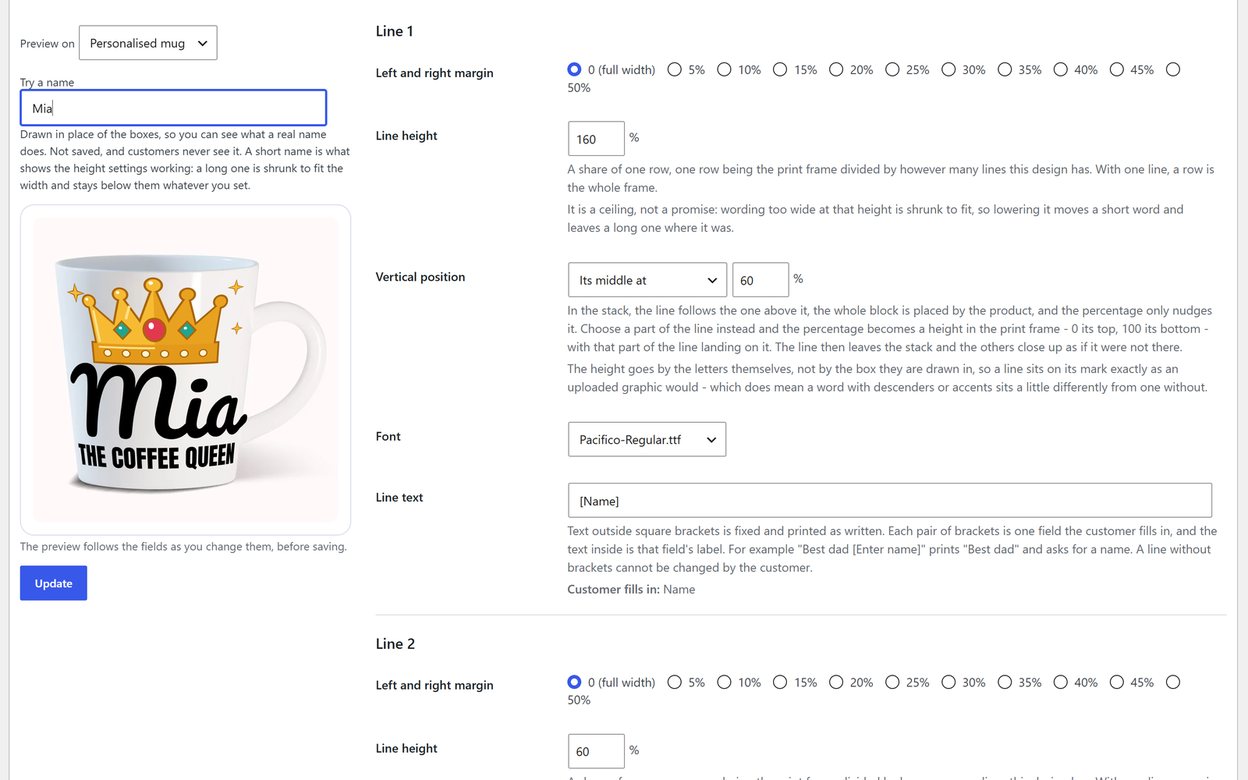
While you set a design up, you can type a test name and watch it on any product you have, before anything is saved. The customer sees exactly the same drawing, and the print file is made from it.
Why it matters for a shop
- One design, every product. A new slogan is written once and is ready on shirts, mugs, caps and bags at once, each with its own placement and colour.
- Previews that sell. A name that follows the curve of the mug looks like the finished product, and that is what the customer is deciding on.
- Files that print. Every order arrives flat, at the right size, with the text converted to outlines.
How this compares with other plugins: the best WooCommerce product personalizer plugins. For curved engraving work in particular, see selling engraved products in WooCommerce.