Guide
Personalized hoodies in WooCommerce: where the print goes, and what lies over it
A hoodie is harder to sell with a name on it than a t-shirt. The print has less room, with the hood above it and the pocket below, and the drawstrings hang straight over the middle of the chest. A preview that ignores either shows the customer a hoodie that cannot be made. This is how to set a hoodie up so that the preview looks like the finished product, with Pomp Product Personalizer, a free plugin for WooCommerce.
Where a hoodie can be printed
The front of a pullover hoodie has one field for a large print: between the seam of the hood and the top of the kangaroo pocket. A print across the pocket’s seam comes out badly with any method, so the pocket is where it stops.
- Width. About as wide as on a t-shirt of the same size, commonly up to 30 cm on an adult hoodie.
- Height. Shorter than on a t-shirt. From a few centimetres under the neckline down to the pocket is often 25 to 30 cm on adult sizes, and much less on children’s.
- Zip hoodies. The zip splits the chest, so a name goes on one side of it, on the back or on a sleeve.
These are rules of thumb. Measure the hoodie you sell, and ask your printer how close to a seam they will go.
Set the size and the place once, on the product
In Pomp the print belongs to the product, not to the design. On the hoodie’s own edit screen you set a print area: a rectangle on the product photo, given in the photo’s own pixels. Every design in the catalogue then prints inside it, and the print file that comes with each order has the same shape.
- Print area. From under the hood down to the pocket, and no further. That is the largest print the hoodie takes.
- Text box. Inside the area, the box the text sits in can be moved and narrowed: a little lower to stay clear of the hood, or to one side for a photo taken slightly off centre.
- Starting position. At 0, a short design starts at the top of the box, where a chest print belongs, and a long one runs down towards the pocket without ever crossing it.
- Print colour for each colour. White on the dark hoodies and black on the grey one, from the same design.
Fabric is not flat either, and a warp grid bends the preview to the chest. That part is in print placement and warp.
The drawstrings: why the preview looked wrong
Photos of hoodies show the drawstrings hanging down over the chest, exactly where the print goes. Draw a name on that photo and the letters land on top of the strings. No printer can do that: the print is in the fabric, and the strings lie over it. A shopper may not be able to say what is wrong, but a preview like that reads as a photo with text pasted on.
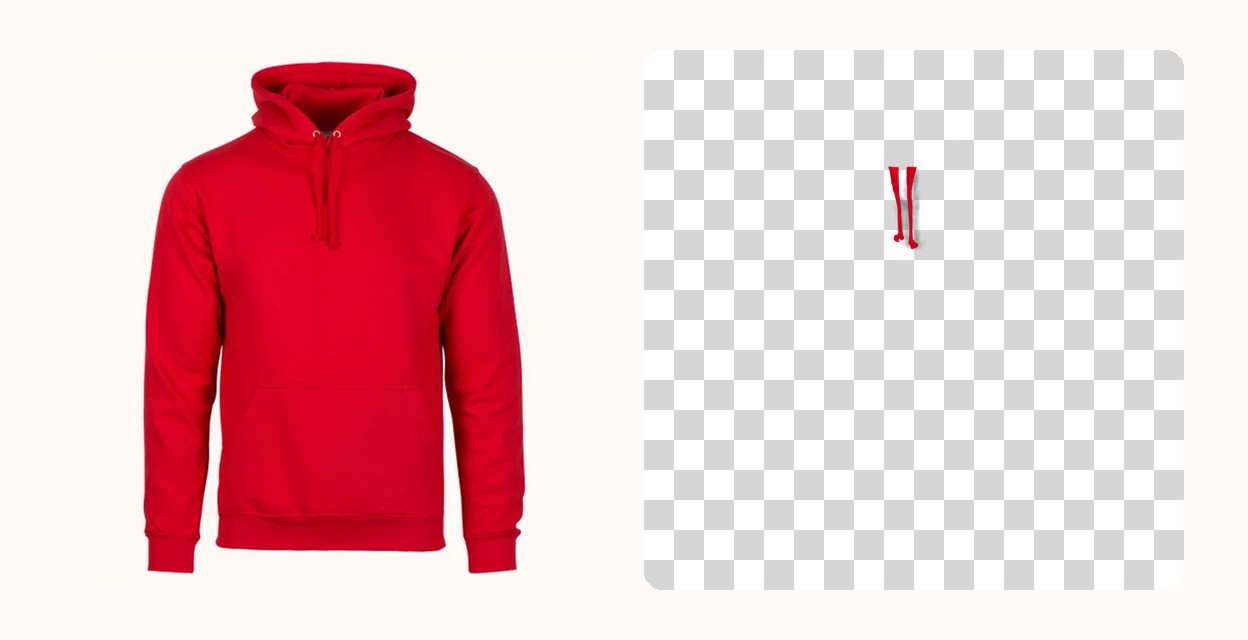
The fix is an overlay: a second picture, drawn over the design, that holds only what lies over the print.
How to make an overlay
- Open the product photo in any image editor.
- Erase everything except what lies over the print: the strings and their ends. Keep the picture the same size.
- Save it with a transparent background, as PNG or WebP.
- Upload it on the product, in the Overlay row under Print area.
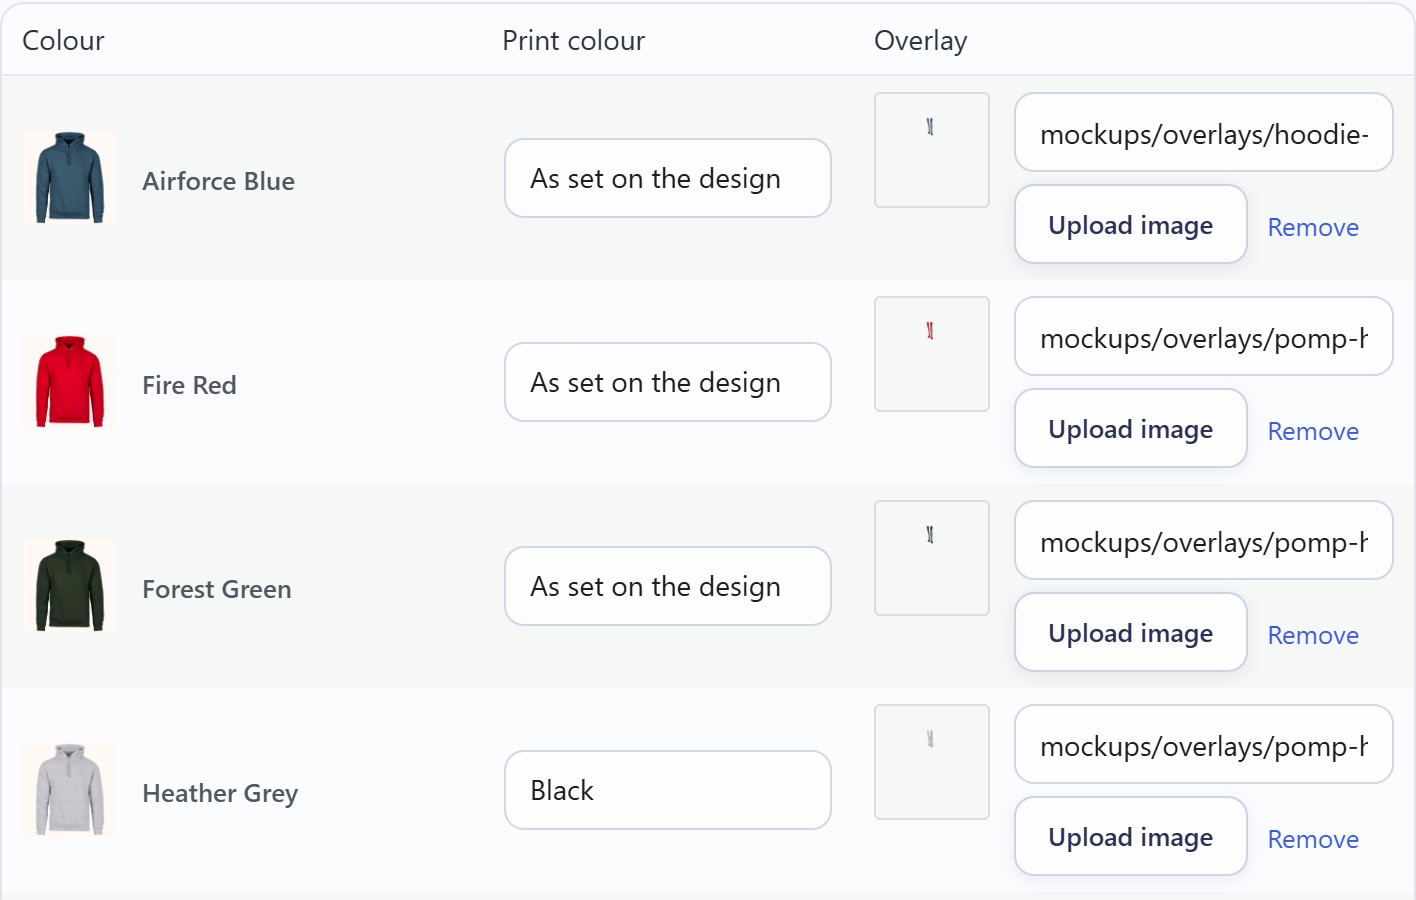
A hoodie’s strings take the colour of the hoodie, so a product with colours takes an overlay for each one, in the same table as its print colours. A product with one photo takes one.
From then on every picture of that product carries the overlay on top: the design catalogue, the live preview while the customer types, the cart, the order and its emails.
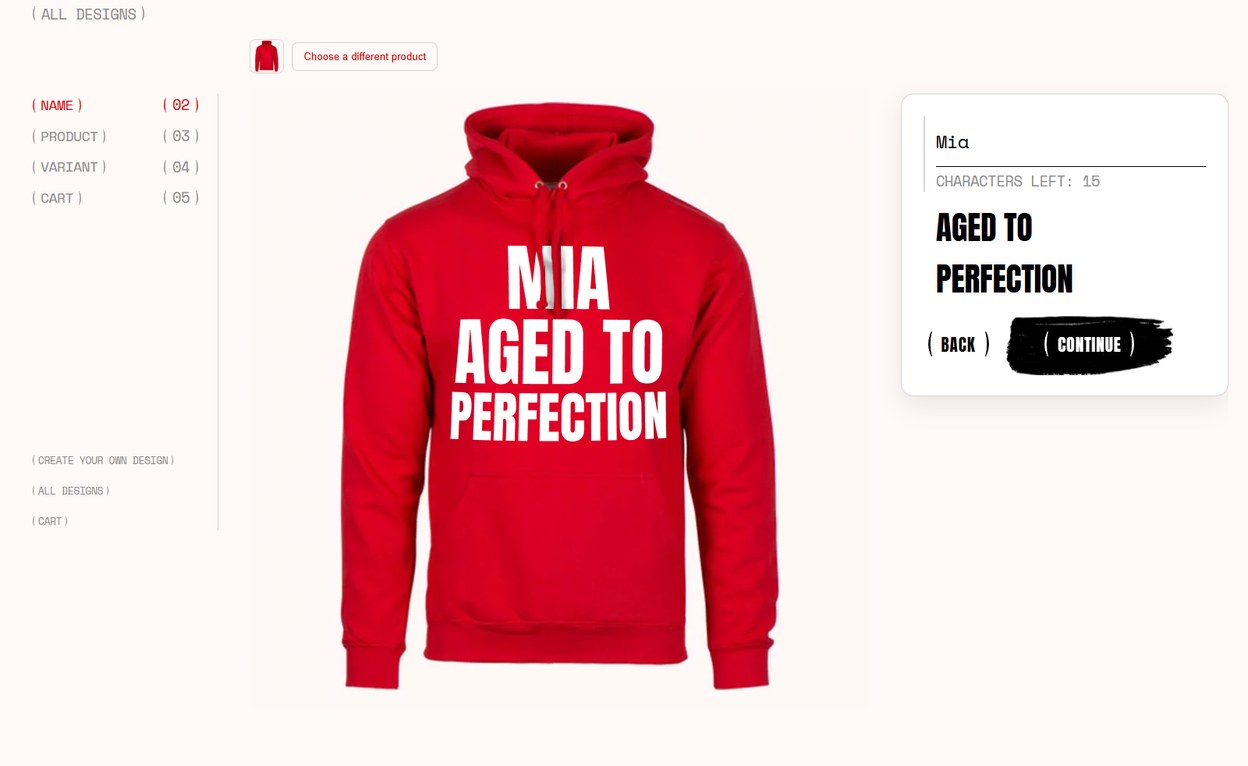
The print file never has it. An overlay is for the pictures. The file that goes to print holds the print alone, flat and in the shape of the print area, as it does for every other product.
Not only hoodies
Anything that sits in front of the print can be an overlay:
- the zip and its pull on a zip hoodie or a jacket,
- the handle of a mug photographed from the side,
- the paw, the mane or the ear of a plush toy that hangs over its belly,
- the strap of a bag or an apron.
What it does for a shop
- The preview is the product. The customer decides on what they see, and a name that sits under the strings looks like the hoodie that will arrive.
- The largest print the hoodie takes. With the area drawn down to the pocket, a long design is as big as it can be and a short one is not lost in it.
- Set up once. One hoodie, its colours and its overlays, and every design in the catalogue works on it, including next month’s.
The print area, the colours and the overlays are all in the free plugin. A print on the back or a sleeve as well, each side with its own photo and overlay, is in Pro. For other products see custom name on a jersey, a hat or a backpack, and the video tutorials show a product being set up from start to finish.